Start your project
- Create (or open) a Unity project. Ensure the Unity version is Unity 2021.3 or below
- Import the URP
12.1.14package - Create a URP Asset in your Project view using
Right Click > Create > Rendering > URP Asset (with Universal Renderer) - Set the URP Asset in your Graphics Settings by going to
Project Settings > Graphics > Scriptable Render Pipeline Settings
Create your environment
- Use the Unity workflow to design your scene
- Set the user’s location and walkable area within your environment:
- Create a GameObject and add the
MonoCircularUserAreaProvidercomponent to it. - Ensure that Gizmos are enabled in your Scene view. You should see a blue avatar with concentric circles around it. The position and rotation of the avatar determine the location and direction the user will start at. The VR Home Screen menu will appear in front of the user when they are in this position in your environment.
- Change the
Walkable Radiusvalue of theMonoCircularUserAreaProvidercomponent. The concentric circles will update to reflect the new value. Set this value to match the area you want the user to be able to walk around in.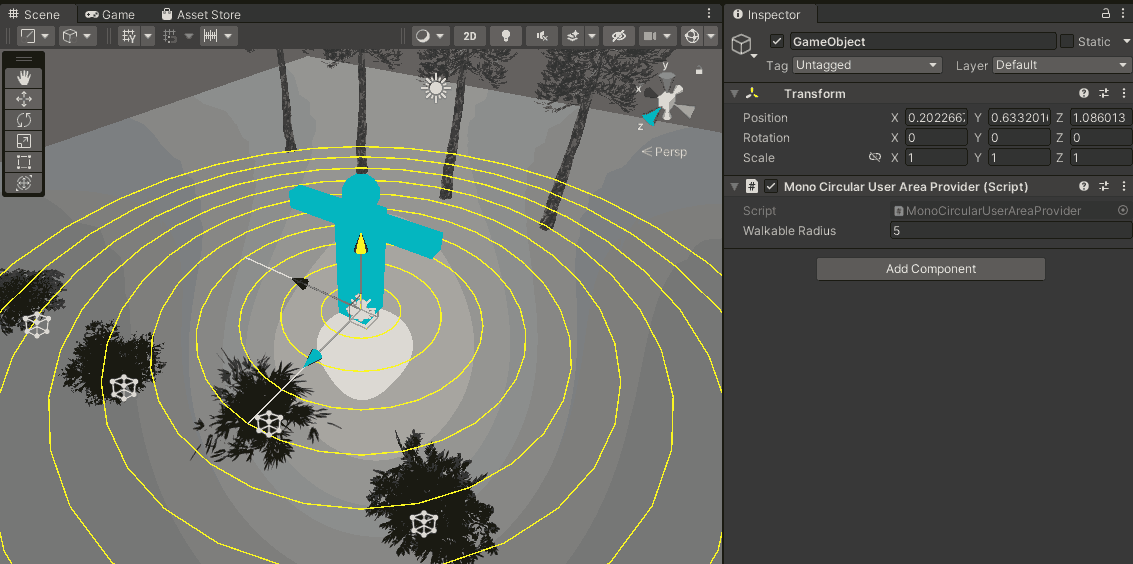
- Create a GameObject and add the
Validate and export your scene
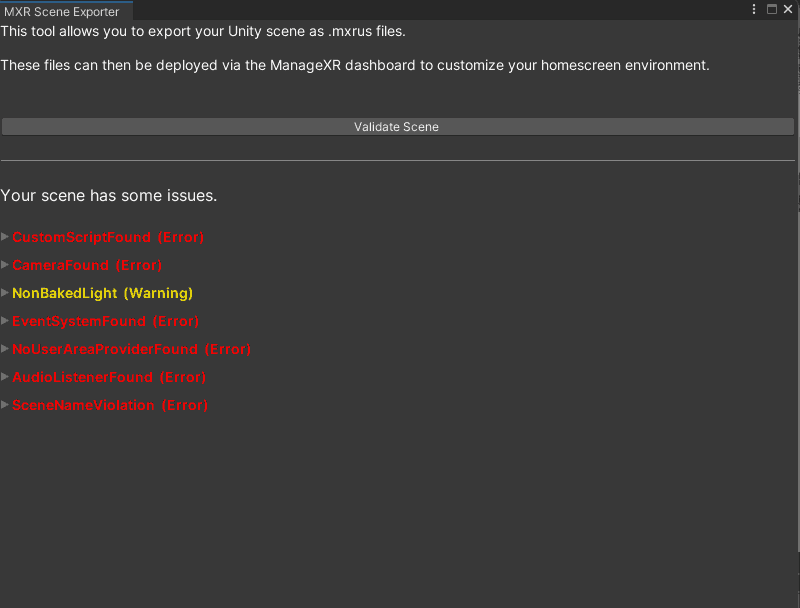
- Go to
Unity toolbar > MXR > Scene Exporter. A window titledMXR Scene Exporterwill open. - Click on the
Validatebutton. This will validate your scene and violations (if any) in your scene will be highlighted. Click on an issue to expand it. A brief description and any relevant GameObject or Asset will be shown.- Issues shown in red will prevent export unless you address them
- Issues shown in yellow are warnings which don’t prevent exporting but highlight potential compatibility or performance problems.
- View the list of possible validation issues and recommended fixes
Export Scenebutton to export the file ✅
Check the size and optimize
Now that you’ve exported your scene, it’s time to verify that the size of your environment is within the recommended size limit of 30MB. Once yourmxrus file has finished building and has exported, you’ll see a build report that will show the different assets that have been packaged. Use the build report to verify the size of your environment and identify large assets to optimize or remove:
Deploy on ManageXR
To upload and deploy your custom 3D environment on ManageXR:- Go to the Configurations tab
- Select your configuration
- Select Device Experience - Note, you must be using Custom Home, Kiosk App, or Kiosk Video
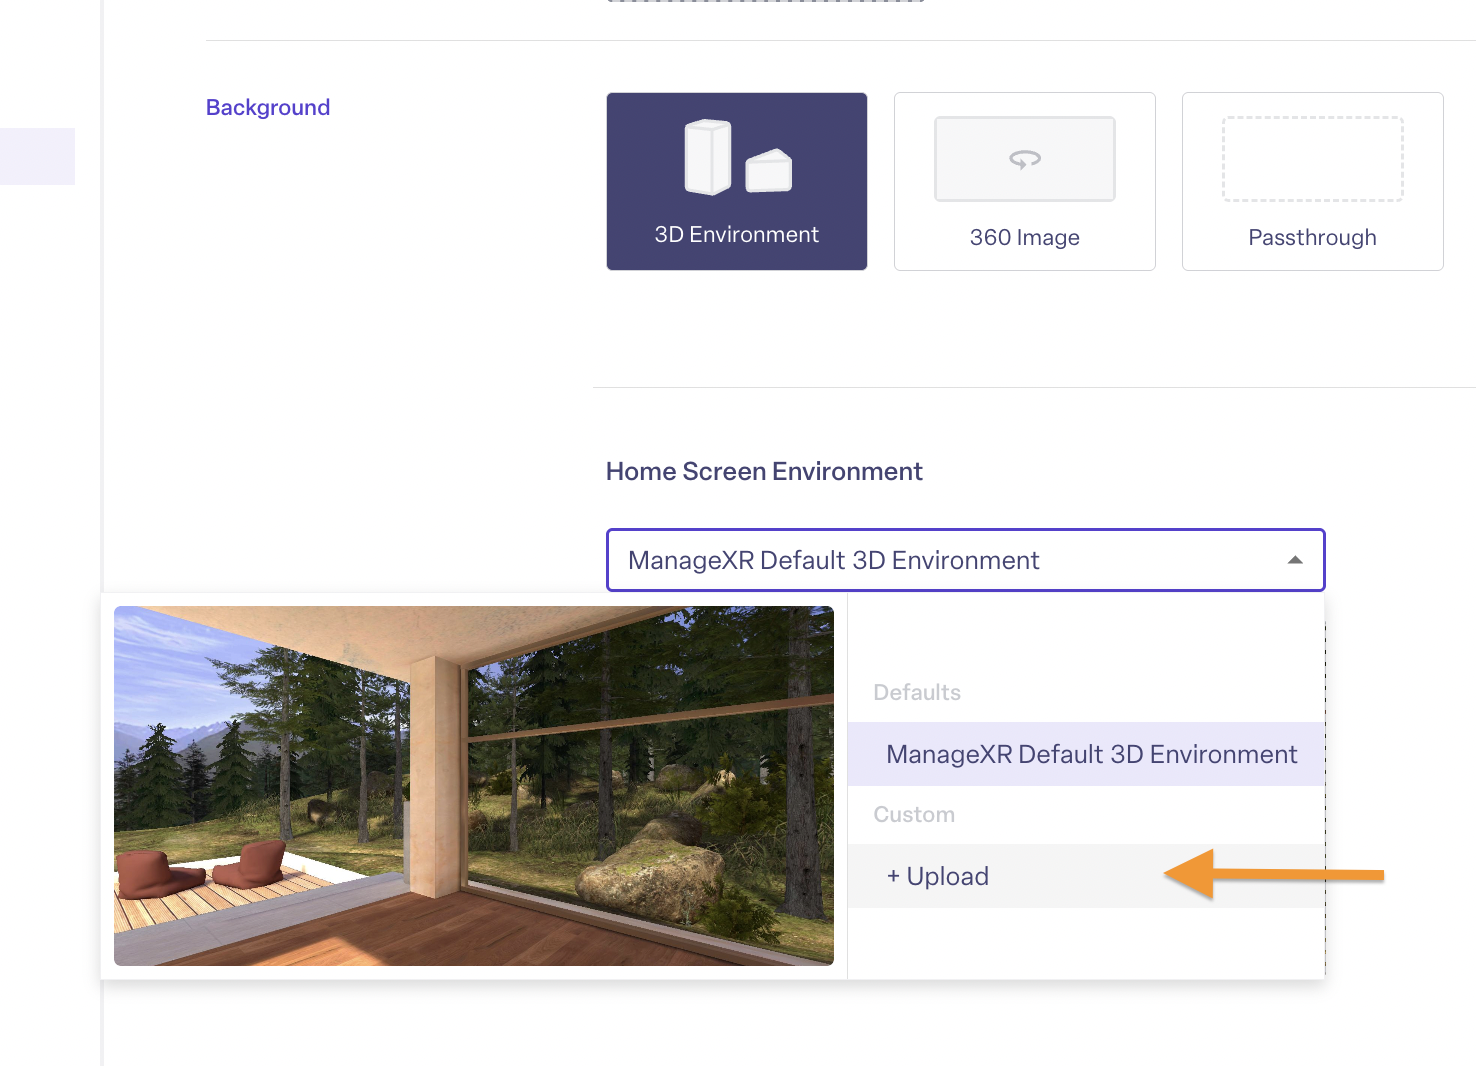
- Under the home screen preview image, select Logo & Background
- Scroll down to Background. Select 3D Environment
- Click on the dropdown and select + Custom
- Drag and drop your environment file
- Give it a nickname
- Press Upload
- Save Changes on your configuration
The next time your devices come online, they will download and begin using your custom 3D environment! Note, you can re-use this environment on other configurations without re-uploading it.